Wednesday, January 25, 2012

Glass Fusing 2

I am writing this just after getting home from week 3 of our glass fusing course. I was looking forward to seeing the results of last week's efforts.


Here is the 6" square plate I made last week, after I cut all the glass. There is a clear layer of glass underneath, resting on three small plastic cups to make it easy to lift off.


The three shards are laid on top of the brown glass. These are pieces that are very thin, like eggshell, only in glass. They come in tubs, you don't have to cut them. Apparently to make them, they blow a giant glass bubble, cool it, and shatter it, so you end up with these very thin and slightly curved pieces. The orange line is a piece of stringer; long thin glass rods that are easily broken into lengths.


Between last week and this week, the magic happens in here. This is the kiln that our work is fired in. As you can see it is big; I laid a pair of scissors at the bottom for scale. It takes all our pieces at once. They are fused first into a flat piece, before slumping the glass into the mould.


This is what greeted me when I arrived for this week's course. One fused and slumped glass dish! You can see the individual pieces flow into each other now. The three shards have got a lot more organic looking too, with softer edges.


Here's another angle, so you can see the curve better. It is flat in the middle; just the corners are curved.


This week we made round dishes. Look for it in next week's episode!

Wednesday, January 18, 2012

Glass Fusing 1

I am taking a course in Glass Fusing and Slumping, at Blue Moon Glassworks on Wednesday nights. We get to make several pieces of our own design in kiln-fired glass.


Here's the first week's work. We took some heat resistant fibreboard and cut shapes into it, to make a kiln carving. The idea is that you let the glass sink into and over your design. Here's the flower I drew, with the pieces cut out and ready to accept glass. My neighbour Dee is also attending the class, and you can see her fish design behind there.


Two pieces of glass go on top of the fibreboard. One is clear and the other is whichever colour you choose. Some kinds of glass - strikers - will dramatically change colour when fired, from almost clear to bright orange or red. Both pieces must be cleaned thoroughly before being placed into position. You can adjust the amount of bubbles that appear in the finished piece by putting the glass together with smooth sides or rough sides facing inwards to each other. Rough sides give more bubbles.


* * * intermission * * *
And this is where we wait for a week between classes... meanwhile the staff in the shop have fired our pieces in the kiln, and when we returned for this week's class, we were presented with this:


Once the fibreboard is removed (with the help of some water, since it disintegrates after being heated), you end up with the finished article.


And held up to the light, you can see the true colour of the glass, and the size of it using my hand for scale.
The glass picks up a lot of detail from the board. One side of the board is quite flat, and the other is more textured. The glass will show the difference in surfaces, as well as any other marks you put in. I made some lines along the petals which are visible here. I also chose the rougher surfaces for more bubbles, so you can see there are indeed some bubbles here.


This week we made square plates, but once again we have to wait for them to be fired before we see how they turn out. Look out for next week's instalment for the next set of before and after pictures!

Thursday, January 12, 2012

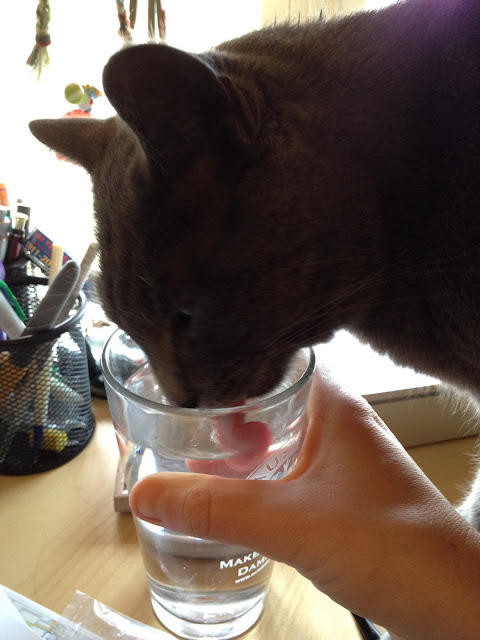
I'll be needing a new glass of water, then.

Smokey loves water. All the better if it's from somewhere other than his normal drinking fountain. Leave a glass unattended, and it will be crept up on, and hijacked. Like this:


Monday, January 9, 2012

Brick Oven Part 9

Work on the brick oven continues apace... Alan now has three rows of bricks in place, and the dome shape is beginning to appear. He is also working on the door/tunnel assembly, which is taking longer than he anticipated, since he has to make his wooden former etc. But we do have plenty of progress to show for the weekend :-)


Friday, January 6, 2012

How Smokey gets on the roof

I was just in time to capture The Leap this morning...! Although he usually uses the other tree, round the corner. I have also seen him fly off the roof and grab onto this tree at lightning speed before now.


Thursday, January 5, 2012

Sleeping spot #34

Not quite as comfy as some places, but Smokey likes to sleep here while I work on the computer.


Monday, January 2, 2012

Brick Oven Part 8

Alan has spent the last few days busy with his oven. He has made a bunch of wooden pegs, with which to prop up bricks to the right angle to curve them in to make the dome shape. Here's some in situ, although this is a practise run and they're not cemented in yet.


You can see the kind of angle each brick makes to the next ones.


Alan has enough pegs for just over a row, at these base levels. Of course the number of bricks will get less as he gets to the top. He really wanted to get some cemented in, but the temperatures have fallen again and it's too cold to cure the cement.


Alan did get some bricks cut and fitted to make the front of the oven, though. These are held with clay rather than cement.


Today, he made some wooden formers for the arched tunnel, through which he will operate. There will be two more formers in front and behind of these. The chimney will be fitted in the middle of these two shown here. He will lay bricks over the top of these formers to make the arch.


Rookie

I haven't taken a picture of Rookie in a while, so here she is sunning herself on one of Tamzin's chairs. Like Smokey, she has filled out in the last few months. You can see the family resemblance in the shape of her face.