This is Smokey's glass now...

I've been wanting to make a sundial for the last couple of years, and finally got off my butt to do it. First stop was the Internet, which is full of resources for the design and construction of sundials.
It's important to know that a sundial should be built for the location at which it is to be used. The bog standard ones you find for sale in garden centres will rarely be accurate, if ever. So I built mine for the specific latitude and longitude of our back garden here in Buda, Texas.
Here's the glass pattern. The gnomon is in red and will be a separate piece, but is placed on the pattern so I know where to build it onto the piece. I did make some tests with paper in the sun, to make sure it would work before cutting any glass.
If you look carefully, you will notice that it is not symmetrical, and in fact the 12-noon line is left of centre. This is due to the fact that we're not located in the middle of our time zone, but slightly off to one side. There are also various choices to make when designing sundials - putting the noon line dead centre will change things.

I start cutting glass and adding it to the pattern. I chose lighter coloured glass for the middle, so you can see the shadow better.

Here, all the glass is cut, and I'm holding the gnomon in place to see what it looks like. I chose the outer edge colours to be darker for contrast with the middle, and also to represent the sun coming up from the earth, past the green plants and into the blue sky, before reversing that journey as it goes down in the evening.

Now I've got all the glass pieces coated in copper foil and pinned to the workboard. It has been tack soldered at this point, so the pins are about to come out before the main soldering starts. Note that I've added some extra foil down the middle, where the gnomon will be attached.

About four hours of soldering later, we have a glass disc. Yay! It is 15 inches in diameter; you can see my hand for scale.

The next step was to attach the gnomon. Straight outside for testing as soon as that's done. It works! It's just about 4pm here. You read the sundial with the longer edge of the top of the gnomon; the shadow should be parallel to the radiant hour lines.
See how the shadow comes to a point just north of the straight, horizontal line? The two lines either side of the horizontal line mark the winter and summer boundaries of where the shadow should fall. The winter line is at the top, and the short summer shadows fall closer to the middle. The very circular line below these is both for decoration and to make the glass hang together better.

Between that picture and this next one was another couple or three hours of soldering to tidy up the seams and tin all the edges, before wrapping some lead came around the outside to make a stronger edge. Next came the patina, to make the metalwork look dark grey. Then it had to be waxed and polished.
Below is the finished sundial, in the shade of our sunroom (an oxymoron, I know). It is sitting on a plant stand I bought from Home Depot. I attached some tabs to the disc underneath, so it won't slide off. There's also a bunch of felt pads stuck onto the metal ring of the stand, to protect the glass.
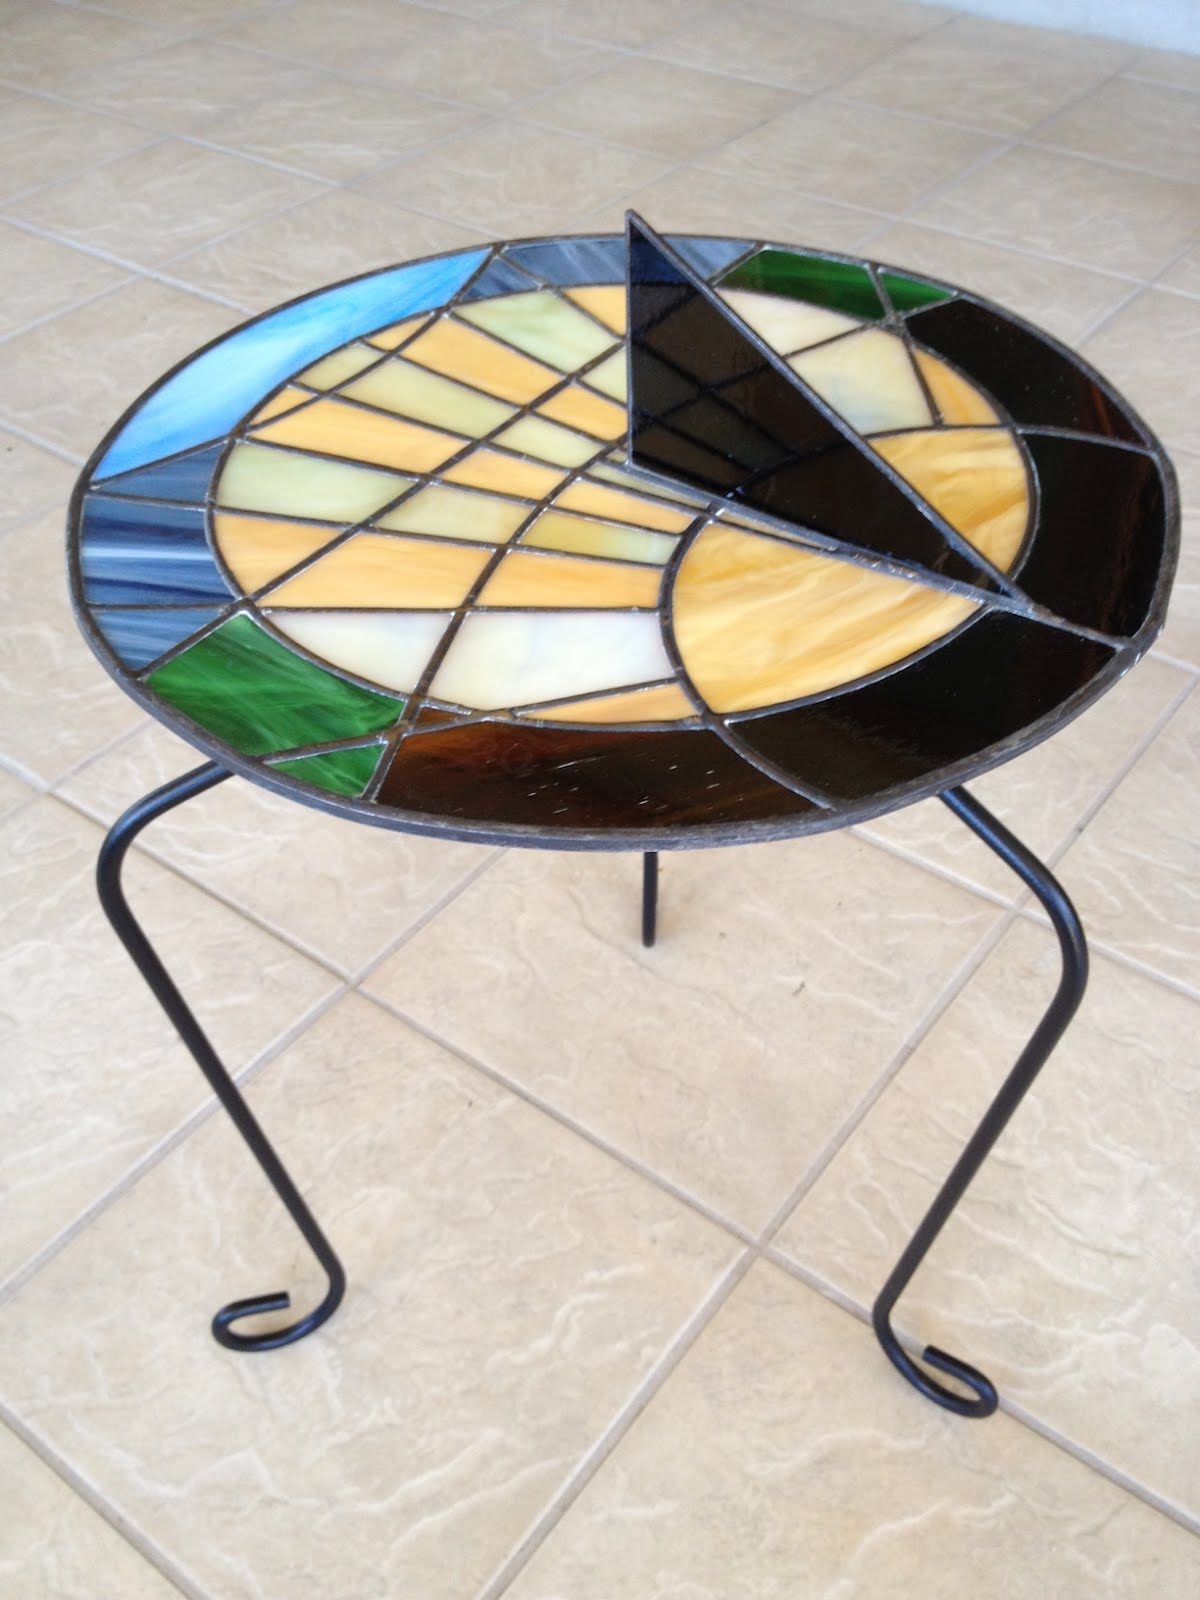
Now it's outside. Remember how the noon line was left of centre? My watch says it's 11:45, and so does the sundial*.

If you look really closely at the edge here, you can see that I do have numbers on the dial. I etched them with stencils and glass etch cream which mostly worked, but they're not very obvious. They show up in certain angles of light. If I did this again, I might try making the numbers in copper foil, or sandblasting them for better visibility.

And one last look at the final piece.

* There's a little bit of licence here. Sundials are only accurate twice a year, due to the Equation of Time, which means they're usually either fast or slow by several minutes, depending on the time of year. So if I line up the dial exactly north-south, which it should be, then it will probably slide away from the time my watch says, by a few minutes. I didn't have a compass on me when I took the picture... that's my excuse ;-)
OK, so we all know cats hate water, right? Sorry, it is not true! Smokey put that one to rest today. He loves water. He loves running water; loves to drink from his fountain, and any running tap or faucet that he encounters in the house. And I've seen him drink from the bird bath on many an occasion, but I've not seen him play with the water quite so much as he did today...
First, he got on the water bowl as he often does. Pottered about up there...

...before taking a back flip down to the ground, complete with water splash!

Then he had to investigate where the water drips were going, and play with some grass.

But he was soon thirsty and wanted a drink, of course...

And then he started bashing the water with his paw. Pretty soon, he'd climbed up again and started giving it a proper go.

He then spent the next 15 minutes chasing leaves and his reflection in the water... getting right into it, he was! I've not seen him deliberately get quite so wet as he was doing here. He spent the following 15 minutes washing himself dry - his front paws were completely soaked, of course - before going about his day. Watch the video to see him in action...
For our final class, we were allowed to choose any mould in the shop to make our piece with. I chose to make a large 12" square dish; quite a bit bigger than the 6" and 7" pieces we'd made previously. I also wanted to do something dramatic.
I visited the shop to choose my glass. I'd had my eye on the red glass here for some time. I'd picked out a pale yellow to use as a base, when Jim suggested that I looked at a yellow version he had. "Hmmm", said I, and promptly purchased them both.
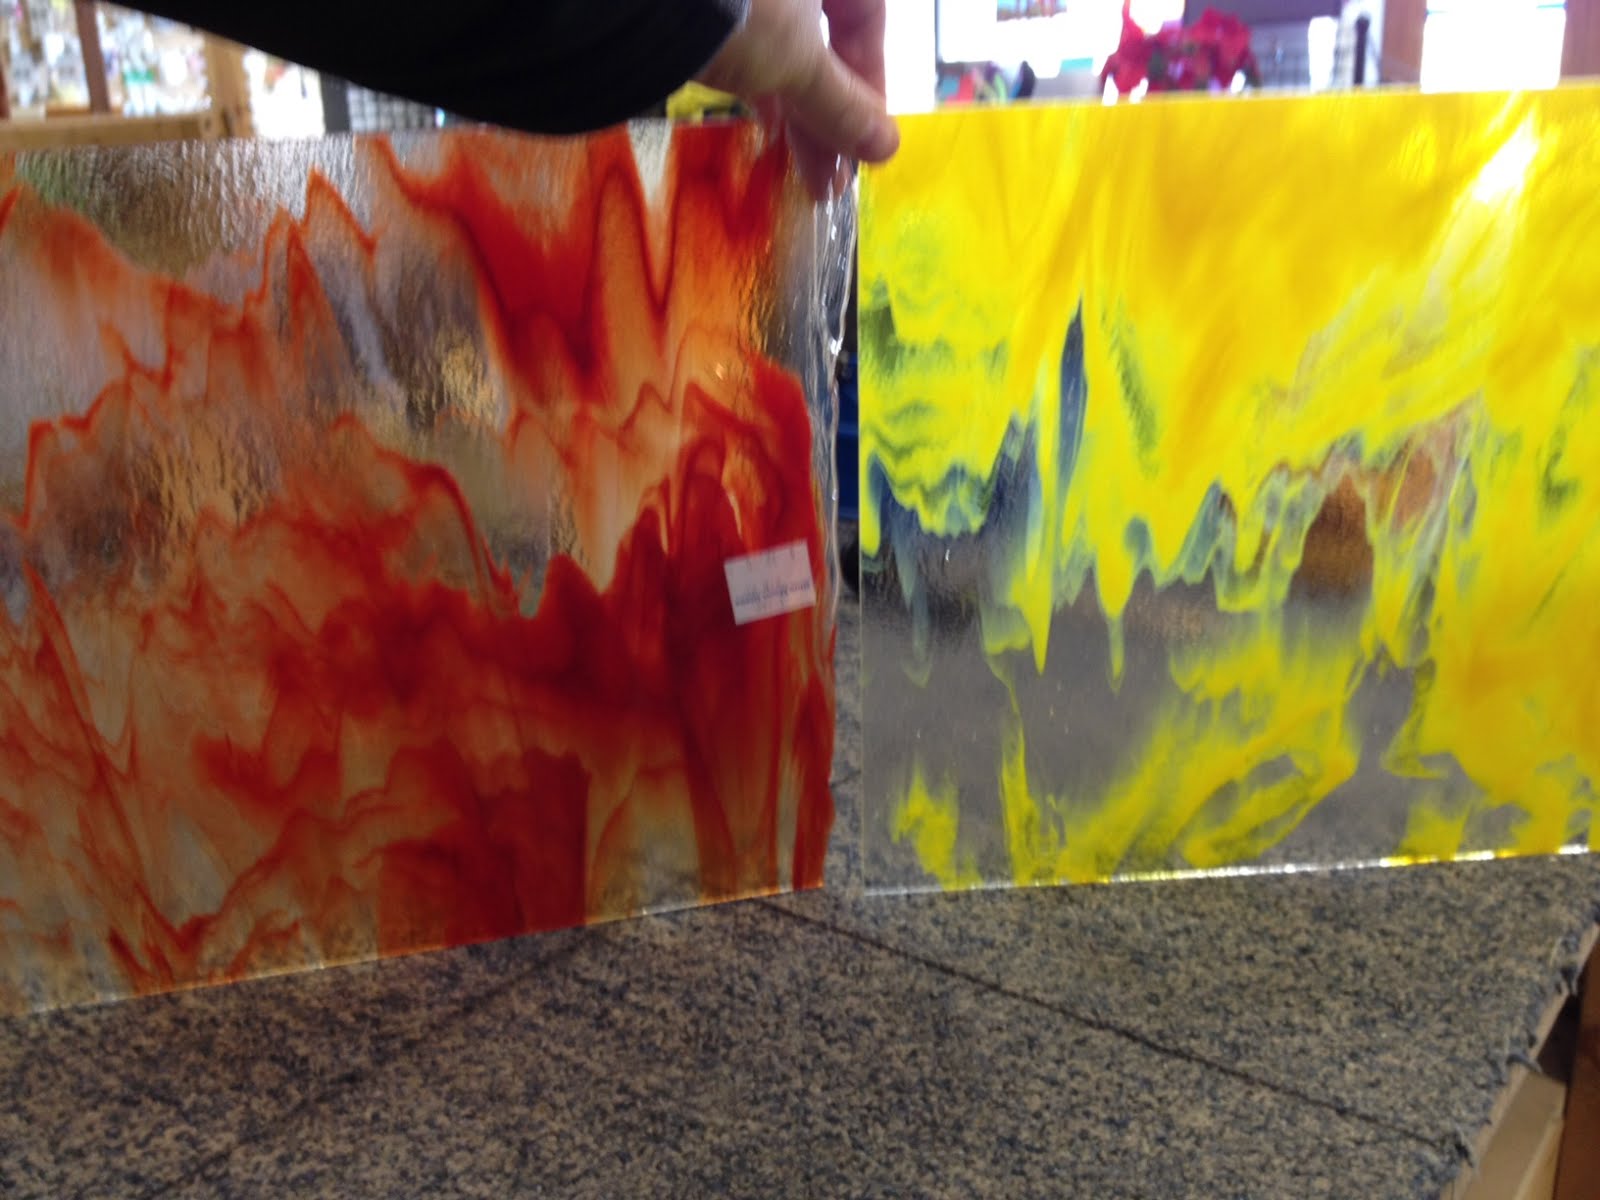
Here's the glass put together in the class. I used some of the iridescent glass I had from my round dish, and figured the blue would set off the yellow and red. I put some black frit on there too, to give it some interest. I used two different sizes of frit, the large and medium sizes.

Here's the dish after I brought it home. The frit spread out nicely. A couple of the blue edges ended up crooked; Sarah said she had to grind them down a bit after fusing as the points had stuck out. I suspect it was the red piece twisting around that pushed them; it seemed to be its mission in life when I assembled it, to twist. No matter. I am glad she was able to rescue it.

Here's a close up of the edge so you can see the frit, and the shiny blue colour of the iridescent corners.

And there we go... my class is done. Will I do any more fused glass? I've certainly enjoyed it, and only scratched the surface of this art form. Time will tell...
I visited the glass shop today and got my pieces back from the last two weeks' classes. Here's the first of them from week 4.
It started out as a normal 7" diameter disc, made from leftover glass from my other projects. This one was going to be a drop ring, so I wanted to have some fun and put lots of details in; things going on visually, in order to see the forthcoming distortion. Lots of stringers (the long rods) and frit (tiny glass blobs) are the order of the day.

I visited the shop a few days later, by which time the discs had been fused, but not yet slumped. So here's what it looks like after fusing. This would apply to all the things I've made so far; they all start out flat like this and get slumped as a second stage.

On week 5 of our class (the final one), some of our drop rings were slumped during the class so we can see what it looks like. Mine was one of these. Here they are in the kiln with Sarah, our instructor, holding it open. She is wearing a Kevlar heat resistant sleeve, since the kiln is at 1325F (718C). You can see the rounded bottom ends of the glass pieces inside, glowing red. The lighter colour tall things are ceramic stands holding up the doughnut shaped moulds.

Here's the final product, after I brought it home earlier today. Mine slumped about three inches; not as much as some and a bit more than others. It depends on the glass, on how much it slumps over a given time.

Finally, here's a look down the inside. You can see how the stringers have curved into the shape of the bowl, and the frit has become elongated as it cascades down the sides. It's basically just a big ol' gravity well. The little lizard on the edge was a pre-cut glass piece in a shiny dichroic finish - file him firmly under "couldn't resist!" - I had to add him in there :-)

So now we know how glass will slump and fall when there's no support. Possibly a bit impractical, but certainly fun.
If you're waiting for a glass update, please be patient.. the final class was last night, but you'll have to wait until next week to see my pieces from both last night and the week before. And so will I, they're not fired yet!
So here's some feline shenanigans for you instead. We will start with Dark Ginger being very patient, waiting for Snowman to actually finish his breakfast before investigating the food bowl. He's taking a drink while he waits. Smokey, at this point, is off doing the Things He Needs To Do when I first let him out in the mornings.

Smokey soon returned, in the company of Light Ginger who proceeded to orbit the back patio with his brother. Smokey seems to tolerate Light Ginger but he's less keen on Dark Ginger. This soon turned into low wauling noises from Smokey, who had had enough of the two of them surrounding his turf. Snowman is just out of shot here; he's gone to hide behind the pallets again. I have yet to get all four cats in one shot.

I retreated to the computer room, and about ten minutes later discovered that Light Ginger knows how to get on the roof, too... Soon followed by Smokey, and the pair of them disappeared around the corner, to do whatever they do.

I should rename this place Cat Ranch, or something... suggestions invited in the comments...
OK folks, another week, another glass dish. This time, we made round ones. This involves a new tool! One specifically for cutting glass circles. It's basically a brass rod with a hinged suction cup on one end, and a sliding cutter head that you can move up and down the rod. Sucker the cup to the middle of your glass sheet, then you can trace out the circle precisely all the way round. You need to flip the glass over and press down at the corners (assuming you started with a square) to turn the score into a crack that penetrates the thickness of the glass. Then you run some score lines from the circle to the outside, and use the running pliers to break the glass. If all is well, the edges should pretty much fall off and you should get a nice circle. In practise, it's a bit fiddly, and half the time the glass doesn't want to crack nicely. But there you go.
So I cut myself a piece of clear glass for the base, and several pieces of different glass for the top. I used one of the iridescent glasses this time; always wanted to use this stuff so here we go. Here it is assembled. I put some amber coloured stringers (the thin glass rods) over the larger pieces of black glass to break it up a bit.

These are some of the pieces (mine's on the right) in the large kiln. You can see this has a flat floor; the pieces get fully fused as flat discs before they're put into moulds.

And here is the finished article. Shiny, eh? The amber stringers didn't show up as much as I was expecting, but that's OK, this class is about experimentation as much as anything. I'm pretty pleased with it overall.


 Posts
All Comments
Posts
All Comments


